

Recording HTTP traffic with JMeter
Table of Contents
Beginner - This article is part of a series.

JMeter has a component for recording HTTP traffic, called HTTP Test Script Recorder. Previously known as HTTP Proxy Server, its functionality is basically that of a proxy server that captures and redirects HTTP or HTTPS requests to both the Recording Controller and the destination server.
How do I start a recording? #
Certain components would have to be placed in the correct order for the recorder to work correctly, but we can also use the templates that JMeter brings by definition and one of them is the recording template, which can be easily used from the File -> Template option and selecting the recording option. There are two recording templates, one with Think Time and another that ignoring these values, depending on your needs we recommend using the one with the timers if you do not plan to do modeling or calculations requests per second. In case you are going to do any of these activities, we recommend not recording with Think Time because it is somewhat repetitive to delete these timers for each of the requests.
Recording #
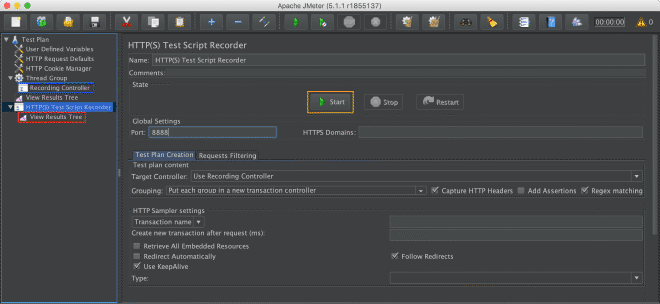
Once the recording template has been loaded, absolutely no modifications are required. Just start the recorder using the button in the orange box for JMeter to generate the recording certificate. This certificate will only be useful if you are recording HTTPS traffic. Our transactions and requests will appear in the blue box within the Recording Controller component. Likewise, in the red box within the View Results Tree component, you can view the traffic captured from your browser or mobile device that has the proxy server configured.
It would be very complex and time-consuming to explain how to configure the proxy for each browser and mobile device, but here’s the recipe for Firefox:
- Go to about:preferences in the navigation bar.
- Go to the Privacy and Security tab.
- Open the Certificates section.
- Import the ApacheJMeterTemporaryRootCA.crt file located in the bin folder and check the options before accepting.
- Return to the General option.
- Open the Network section.
- Configure the connection and enter the proxy server address. If it’s your own computer, enter the IP address 127.0.0.1.
- Check the option for all protocols and set the port to 8888.
It’s worth mentioning that if something goes wrong, it could be for a variety of reasons. We invite you to join our Slack channel, where it may be easier for us to support you by sharing logs and images.

Finally, when recording, we can select the labeling type as Prefix or Transaction Name in the yellow box. This option will depend on both your needs and how we plan to report the results. For beginners, I recommend using Prefix.