

Scenarios in JMeter like LoadRunner
Table of Contents
Intermediate - This article is part of a series.

For those who don’t know my story, I am originally from LoadRunner. That’s where my career as a load tester began and was largely developed with that tool.
When I started working with JMeter, I fell in love with its features. But trying to create more complex scenarios in the way LoadRunner did it without much trouble was a struggle for me. Even worse, LoadRunner handles the scenario creation part as if it were a completely separate tool from the one used for script creation.
Unfortunately, JMeter does not clearly separate this because it handles everything on the same interface: from creating scripts (or multiple scripts), setting up scenarios, and executing them all within the same program.
This difference caused me problems when I had to perform tests with more than 5 simultaneous test cases. It already looked chaotic with 5 scripts, and managing up to 10 or even 15 would be an enormous challenge using the same tool. Not mentioning maintenance can become complex and difficult to distribute with a team of scripters.
How Do I Do It? #
My first impulse was to use it as is. Without doing anything outside of what it already comes with. And as mentioned above, the execution became quickly a hell of creating, maintaining and working with it.
After struggling with this problem, I gave up and decided to try something. Guided by what I knew about the world of LoadRunner, I tried to mimic a bit the way of creating scenarios simply by pulling scripts and editing each one separately.
After some adjustments, I was able to achieve this by doing it this way. So now I’m sharing with you how to do this in simple steps with explanations that can make the life of a load testing team easier when different people work on different automation scenarios for the same scenario and don’t have a cloud environment.
Step 1 #
The first thing is to have a JMX file for each business process that our load testing will execute. Do not copy or paste other automation scripts and combine multiple processes into the same file. Just one test case in each one.
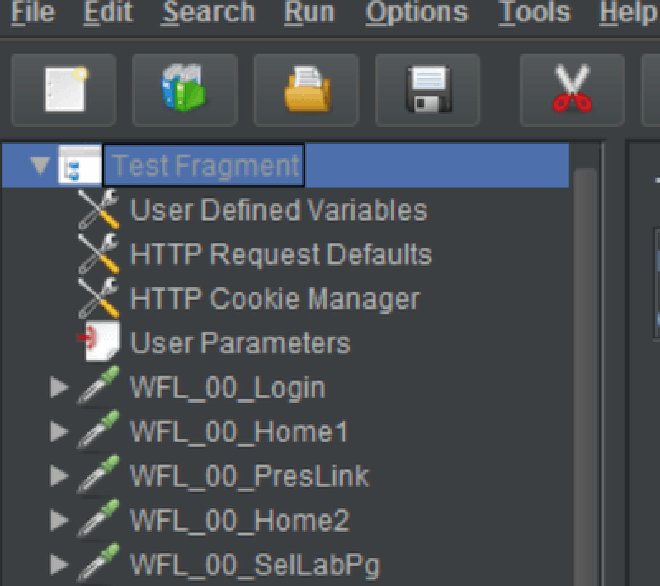
But unlike traditional steps, here we will put all the steps of our automation under a TEST FRAGMENT. Nothing thread controller or anything. Let’s try to clean up the steps and get down to what we’re doing.
Only add the HTTP components related to each one. The REQUEST DEFAULTS and HTTP COOKIE MANAGER should be added and configured if necessary.
Step 2 #
Another important step to make this work is declaring “think time” in a global way so it can be applied equally across the relevant steps in each script. But first, we need to create a USER PARAMETER with which we will work.
We will call it the Think Time variable or thinking time variable. We can assign a fixed number (expressed in milliseconds) or an approximate number around that fixed number to this variable. It is recommended to use the random number for not having equal waiting times and risking losing realism in the test.

Step 3 #
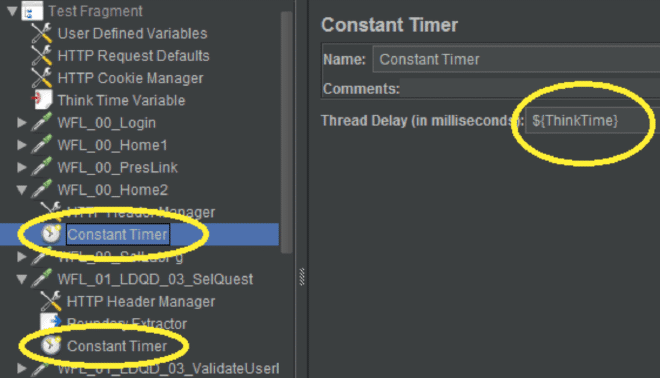
Now, for each step where we need to add the Think Time (not all steps should carry it), we add a CONSTANT TIMER at the end but within each HTTP REQUEST.
Once the CONSTANT TIMER is added, simply assign the name of the USER PARAMETER created in step 2. That means putting “${ThinkTime}” in the Thread Delay - or the name assigned to the variable.
At the end, we repeated this in each HTTP Request that should include a think time. This way, we simply updated the USER PARAMETER and everything else will be updated as well.
Once these steps are completed for each step in our business processes, now we can start building the scenario. We can close the scripts.
Step 4 #
To create the scenario, we will start with an empty JMeter project. We will first add what we need for Listeners and reporters. I recommend having at least the View Results Tree as well as the Backend Listener (or JSR233) to send results to a platform like InfluxDB.
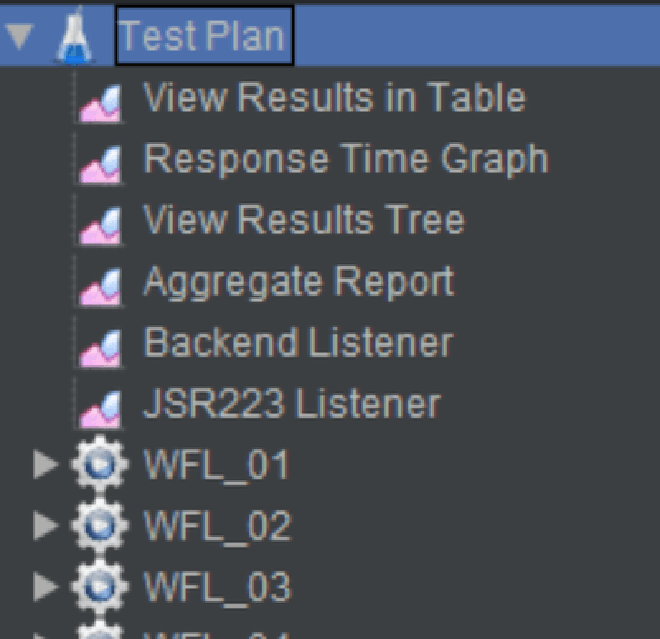
Now, for each script we want to have in our scenario, we will add an THREAD GROUP and by sanity of mind we will name each one as we name our business process.
Each THREAD GROUP will be assigned the necessary settings for each business process, such as ramp-up or duration and the number of threads for each one.
Step 5 #
Inside each one, we will add 3 elements:
- USER PARAMETERS
- INCLUDE CONTROLLER
- FLOW CONTROL ACTION Each of these will fulfill different functions.
The USER PARAMETER element will be used to define some RTS (Run Time Settings) in the style of LoadRunner. Inside it, we will declare at least the amount of time to wait between each iteration. As it is recommended not to have fixed values, we assign maximums and minimums for our random.
Recommend not going too far out of the way and respecting a variation of 5 or 10%. That means if we need a pacing of 5 seconds, we can set maximums and minimums of 4.5 and 5.5 seconds. Remember to put everything in milliseconds.
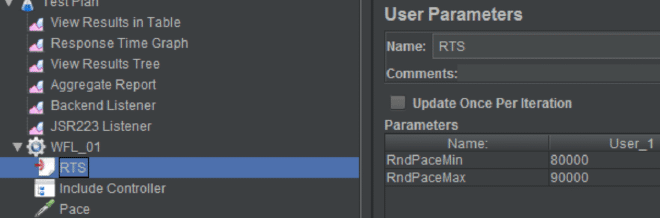
As you can see in the image, I changed the name of the parameter to RTS. This is simply done to make it easier to identify when working with them. Even if someone external needs to modify the scenario, the name makes it more indicative.
Step 6 #
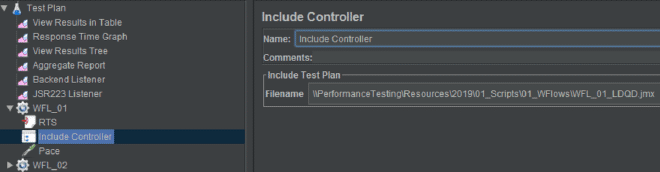
Now in the INCLUDE Controller, simply link it to the location of our script.
Recommend to add shared or public folder locations. Even if the scripts are on the local machine, it’s better to have everything as a shared folder to avoid reachability issues or limit our scenario to running only on one machine. We can thus move the scenario file and run it from where we feel like (as long as the shared folder is reachable).
When you run this scenario, JMeter will load the steps and execute them in a cleaner and simpler way to organize.
Step 7 #
Now we proceed with the Flow Control Action that we added at the end of each one. This is the one that will execute the wait time in iterations. That’s why I put it at the end, so the wait time happens after the script completes its steps in an iteration.
I recommend calling it “Pace” to make it clear what this step does. We’ll select the pause radio button, “Pause,” to indicate that each element should stop there. Then in the duration (Duration) section, we’ll add the following code that will automatically randomize the pause duration:
${__Random(${RndPaceMin},${RndPaceMin})}

This will pull the values we defined earlier in the RTS. That’s all you need to configure our Pace. You don’t need to select anything else in that element.
Paso 8 #
Once the first THREAD is completed, you can choose to duplicate it to create each thread and then configure only what is indicated in each element. Be careful, this may lead to forgetting to put the correct configuration.
If one is very diligent, steps can be repeated for each script. It is important to ensure that each THREAD has the elements described.
Done #
With these steps, they can execute complex scenarios and happy testers and happy engineers! Happy scripts friends! Hugs :)